Search This Blog

Thursday, June 30, 2016

Rifle Weight

Before I even get started on this topic, let me say this: The weight of your rifle is affected by the amount of tape on it. Whoever has been trolling around the internet claiming that the weight of the tape is insignificant and doesn't make your rifle heavier is just dumb. Tape has mass, it is pulled on by the earth's gravitational pull, and therefore it has weight. If you have more tape, it then has more mass, is pulled on harder by gravity, and is therefore heavier. I taught this concept in Freshmen Physical Science class at my previous high school teaching position.


Anyway, back to your question. What weight should your rifle be? It should be the right weight for you. There's a lot of trend toward these new plastic rifles because they are weighted the same across the board. This might be great if all of your team has the same ability, but I generally teach high school students who are just learning how to do color guard and don't always know all of the intricacies that it takes to make their equipment spin the same. So maybe you call it cheating, I call it a good balance. My stronger kids get the heavier rifles while my weaker ones get the lighter ones. It can be daunting for a skinny little 14-year-old girl to pick up a 6-pound rifle her first year. She shouldn't have to spin the same weight as my 18-year-old three-year vet who's been hitting the benches with his football team in the off-season. If I do that to her, she's never going to want to spin rifle and she will forever think that she is just a flag girl and destined to never spin weapons before she ever even gets to sabre!


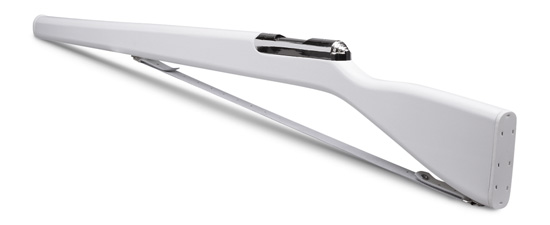
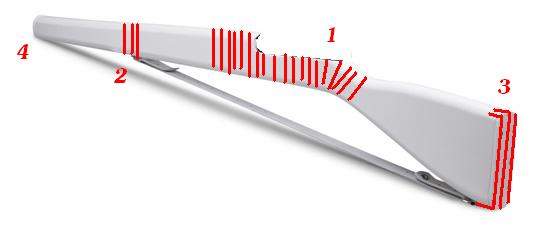
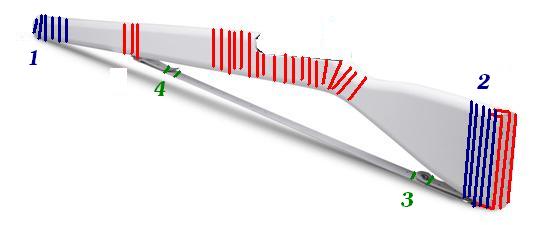
We don't tape the entire length of our rifles unless we absolutely have to. This past season, we absolutely had to tape the colored rifles all the way down because they needed to be colored. So we did. But all of our white rifles were minimally taped. One year we used aluminum foil tape on our rifles; man, that looked cool but those were the heaviest guns on the planet (think about it, they were aluminum plated). I have used more tape to try to even out the weight of rifles before but that's pretty much futile. If you really want your rifles to all weigh the same, splurge on the plastic ones.


Oh and one final note; don't add pennies to your equipment. Sure, they get the job done as far as off-setting the balance and adding weight right where you want it (or causing your rifle strap to make that AWFUL slapping sound as you do spins) but it isn't worth the risk of having ONE student tape theirs incorrectly to the point where they have a penny fly off and wind up in someone's eye. Nope. There are enough things flying through the air in color guard as it is, let's not add tiny bits of metal to that.


<3 Jackie

Wednesday, June 29, 2016

Where can I buy flags and rifles and stuff?

I'm kind of surprised that I get this question at all, considering I am sent three of every guard catalog every season, plus countless dance catalogs, and I'm constantly having to unsubscribe myself from e-mail lists of guard and dance equipment companies. Here are some websites where you can order stuff:


American Band Accessories - These guys are practically local to us and are the NICEST sales people on the planet! If I could buy every single piece of equipment from them for all of my guard things I would.

McCormick's Enterprises - If ABA doesn't have it, then these guys definitely will. They also have the easiest and best virtual flag designer on the entire internet. Plus, they will match prices if you see the same stuff advertised elsewhere for less!

Designs by King - Hands-down BEST weapons on the market! However, hands-down WORST website on the market. If you can buy their products though other companies (like ABA or McCormick's), you definitely should, because navigating this website is like going on a trip back to the early-2000's and getting an assignment to create a website in your 10th-grade Microsoft Publisher class.

Band Shoppe - Home of the Airblade. 'Nuff said.

FJM Inc - They're one of the oldest companies in the business, and they are still family run so that's pretty cool. However, their prices aren't always competitive so I tend to avoid them if at all possible.


Hopefully that is enough to get you all started! Put your e-mail address out there and maybe even your mailing address if you want to get a catalog in the mail too. Happy equipment shopping!


<3 Jackie

Tuesday, June 28, 2016

How do I start my own independent color guard?

It's always interesting when I get asked this question because nobody really wants the real, truthful answer. What they want to be told is "just grab a whole bunch of your friends, make some posters, and meet at the local basketball court to have practice!" And that can work, I guess, but it won't last long.


If you really want to run a color guard you have to look at it from a business standpoint. It has to make money. That's the part that nobody wants to know about. It's the part that everyone in the performing arts tries to hide... cover up the monetary aspect! It has to be all about the art! We can't let them know about the money! Sorry, I hate to be the one to bust the illusion but it's the fact of the matter. If you, as a human being, don't make money then you don't get to eat. If an organization doesn't make money then it doesn't get to survive either. Granted, there are programs that will step in and help businesses out, especially non-profit organizations, just like welfare is there for those who need that extra assistance. But depending on that sort of assistance means completely tying your hands and losing your freedom to make choices as a business.


Anyway, back to how to start a color guard... My first piece of advice to the average color guard performer/designer is this: DON'T. Just go find another guard that's already been established and work for them. If you're still with me at this point and really wanting to give this a go then alright, let's get down to it. The next thing you have to realize is that there's no defined path of success with this sort of thing - you have to make your own way and your own rules. With Spintronix, for instance... I ran a Weekend Camp for a couple of years to drum up some interest in the community before even thinking about starting an independent group. In fact, the independent group was not my goal whatsoever! I actually wanted the local high school to see how well I could run a guard and then allow me to have a scholastic group there (another story for another day). After the success of the camps, I started the guard and enrolled in our local circuit, then after a couple of seasons of that I put together an application for a non-profit 501(c)(3) from the federal government.


Now, this was the tricky part. I had been advised well that it is difficult to earn a 501(c)(3) on the first try, and realize that I would have to revise the application and turn it back in multiple times before it would be approved. So I spent an entire summer on that application... No really, that was my only project for the whole summer. I made sure it was perfect because I didn't want to have to do it ever again. And I didn't have to, because thanks to my meticulous record-keeping from the previous few years and all of the people who read over and helped me revise my wording multiple times, we were approved on the first try.


Here's where everyone thinks "Finally, Spintronix started rolling in the money!" and I'm not going to lie, I figured grants and donations would just come pouring in after that point. Guess again. Sure, we were finally eligible to apply for grants, but most of what we qualify for are arts grants. Do you know how many arts grants are out there? People who supposedly know the biz will tell you there are thousands upon thousands of arts grants, boasting millions of dollars in potential finances to keep your programs running. I applied for eleven of those within the first six months of having our non-profit status; know how many we won? Zero. Grant writing is not easy, and it takes a LOT of time, and when you are a full-time teacher who also runs an NPO on the weekends the last thing you have is time. Honestly, we probably would have done better to open a for-profit business.


It's been a lot of work to get to where we are today. We have to depend on the generosity and graciousness of a lot of people in our community in order to keep going right now, but I know things are going to get better. The thing is, if you really want something to happen then you have to put in the work to make it happen. This can be applied to ANYTHING that you might want to do in your life from starting your own guard to becoming a movie star. The people who were so-called overnight successes actually put in YEARS of hard work to make it happen, and they often did it while juggling other responsibilities in their lives like jobs and families. There aren't short cuts, so you need to just buck up and prep yourself because if you want to get somewhere then you need to work for it. And when people get you down (which happens a LOT any time someone is chasing their dreams) you have to remember; the reason that people discourage others from following their dreams is because they've given up on their own dreams and aspirations.


Want to see behind the scenes of running a guard and what we do? Come be a Spintern for a weekend. It could change your life.


<3 Jackie

Monday, June 27, 2016

Demand their respect - Advice for first-time coaches

I had an e-mail with this question just the other day, and I gave a really thorough answer, so I wanted to share it with you as well. It's probably the most important aspect of coaching color guard or working with kids at all - because if they don't respect you then you can't get anything else done. The second thing is getting them to get along and work together, even if they don't like one another.


The big thing with teaching kids these days is that you can't expect to be their friend, you have to make sure you assert yourself as an authority deserving of respect. This is where a lot of guard instructors come off as mean or rude - but it's not necessary, you just have to find your own personal balance. Keep in mind that kids LOVE structure! They may grumble about it sometimes, in fact I probably get called a "slave driver" at least once a week, but all in all the kids who have a rehearsal agenda and are kept on task at least 90% of the time have WAY more fun in guard than if they are just left to run free and do what they want. You will most likely have some who will want to have some control of practice as well, but rather than just letting them say what they want whenever they want I would give them a part in "planning" with this activity: Goal setting.

One of the biggest things that has helped my guards get along is this goal-setting. We will sit down and make two lists; one for season-long goals and one for short-term goals (either for each rehearsal or each week). We make a big poster-sized checklist to hang on the wall in a very visible place. Then, every couple of weeks we have a chat to decide if we have been meeting our goals or if they need to be adjusted. And this definitely doesn't have to be formal!! We do stuff like this while we are sitting around taping flags or eating a snack. I even do this with my guards that I do clinics with, though it's an abbreviated version where we set camp goals and then season-long goals and the camp goals are things that I can help them with but the season-long goals are things that they have to take care of themselves.

We also do weekly or bi-weekly teambuilding exercises. You can find TONS of these online, and you can even assign specific members the task of researching team building games and teaching them each week. It puts a little pressure on everyone to be group-minded and have some compassion for those who are the center of focus.


If you have any questions about color guard you would like answered, please feel free to contact us! We will get back to you ASAP and may even post your Q&A on our blog!


<3 Jackie

Sunday, June 26, 2016

Post-Disney Wonderings

Having traveled to Disney twice this year and planning to go one more time later on, I have had a lot of interesting thoughts running through my head concerning the theme parks and the company itself. Namely, those people who try to de-throne Disney by "exposing" them and all of the "horrible" things that go on back stage. Disney isn't stupid... Walt himself was absolutely not stupid! They know that there are awful things in the world, but the entire point of Disney is to provide a place for children to safely drop any possible worries about those things and just unwind. And their parents, too! But we really have to realize that it's all about the kids at Disney, and they aren't parading around pretending like they are better than everyone else, they are very up front about the fact that they are creating this illusion of what it would be like to live in the happiest place on earth. And it's so cool!

Then there are those who want to focus on the stringent employment conditions of the Disney cast members. When you audition for the Disney cast, though, you have to realize that you are auditioning to play a part, to play a very specific role that has already been defined for ages in movies, television, games, and the parks themselves. If you have a face tattoo then you aren't going to look the part to play a Disney princess because none of them have face tattoos. Disney isn't saying that all face tattoos are the work of the devil, just that you have to look the part you are applying for. And you have to keep in mind how many hundreds of thousands of people audition for Disney parts EVERY YEAR!! There is basically an endless supply of understudies ready to step up if someone in the cast isn't pulling their weight. It's not something that Disney keeps secret, but they don't flaunt it either, because what would be the point?

Honestly, I think they are doing a good job with what they've got to work with - which is a world full of harsh realities and tough decisions. They didn't get to be the social crown jewel that they are by being stupid. If more people stopped obsessing over the tiny details and looked at the bigger picture of what is going on, maybe we could work toward a brighter future instead of wasting all of our time being petty. America was supposed to be the land of the free, raising up some of the greatest leaders this world has ever seen. Instead we have let politics and money get in our way; as is the habit of any human who allows themselves to be guided by their faculties instead of letting their conscience be their guide!

Saturday, June 25, 2016

Marching DCI this summer? Here's what you need to know.

As everyone makes their way to the corps they call home this week/weekend, i have a few things for you.

If this is your first year of corps, REVEL IN THE MOMENT. Welcome to the family, the giant drum corps family that you will now forever be a part of. DONT GIVE UP. Just because it is hard, just because you feel like you’re literally dying, just because you can’t breathe, are tired, back hurts, your leg is doing something weird by the time you hit the second movement, whatever… Stay with it. I promise you it gets better and will be worth every second.

For the age outs, LIVE YOUR DREAM. This is the last time you’ll be able to werk it out with your respective drum corps. Make as many memories as you can. DONT BE BITTER. Things might not go your way for half the season. You might think the staff is coming for you (even though I know Robin totaaaaally was coming for me all season bahaha), your brothers and sisters aren’t fully behind you, whatever. I promise you that whatever you may feel is just defeat and you CANNOT BE DEFEATED IN THIS ACTIVITY. You are the star of the activity, the force that inspires so many, the representations of countless hours of musical and athletic ability. I believe in you, even when you’re ready to just be like LET ME GO HOME, and you have people rootin for you.

A quick reminder that you were chosen out of eight zillion people that audition for drum corps every year, you were chosen to represent the corps you’re with, to make history, to forever be a part of your specific corps family and the family of drum corps international. Perform your hearts out and make it the best you can. I would do anything to be back on that field in Lucas Oil with my brothers, and I’m sure many others would say the same.

I love you all. Splooie, FCO, CMFC, six words, FHNSAB, MYNWA, SUTA, lhold on, etc. and so on. I am so proud of each and every one of you. I can’t wait to see what’s in store for this season!

- Nicholas Powers

Friday, June 24, 2016

Graduatory Thoughts

It’s graduation season once again, and as I make my rounds to all of the schools where I have students completing their final year once again I have a moment to sit back and just be observant. This is something that happens quite rarely so I need to take it in while I have the chance and get it down while it is still fresh in my mind!!

It is often thought that popularity is determined by how loudly your friends cheer and how many of your friends there are during graduation. However, I had a fantastic viewpoint of a graduation ceremony today that completely changed my perspective on that. It has nothing to do with popularity; it’s all about how much of your family showed up that day. Yes, friends do cheer and clap, but it’s nothing compared to what the family will do to show support for their little girl or boy growing up into a young woman or man.

And you’re like “so what then? This has nothing to do with color guard…”

Well I’m about to get there!

As the senior slideshow played, and again as the seniors were announced to walk across the stage to get their diplomas, I noticed something incredible happening. The students who were popular had people cheering for them, the students with large families also had sections cheering for them. However, that was nothing compared to the band kids. Because every single one of those current band members cheered loud and proud for their graduating band mates. Add that on to the biological families of those seniors, their smattering of friends, and even a chorus of band alumni that were nearby to support and encourage one of their own - and you’ve got the loudest cheers in the whole gym. It was a beautiful experience.

Band isn’t just another class, and it’s definitely not just a sport. You live with these people all year long, and you create such a supportive framework that it’s nearly impossible to break. It even goes beyond just your high school years and on into life. What other school activity does that? None that I can think of…

Thursday, June 23, 2016

The Guard Dictionary - How to color guard

The dance terms were such a hit, and I had a lot of requests for this from instructors! Guard lingo can change a lot in a very short amount of time, so here is a list of some common guard phrases that will help you in your teaching and/or learning phases of color guard!


  • Across the Floor - During rehearsal, this is a type of exercise in which members perform the selected dance move repeatedly while moving across the rehearsal space.
  • Bolt - The plastic piece on the top of the rifle. Also, a type of weight used in the ends of aluminum flag poles.
  • Charleston - A dance move from the 20's in which one foot steps forward, then the other kicks forward before stepping back, and the first foot kicks back.
  • Click Sticks - A pair of drum sticks that the instructor uses to keep time during rehearsal.
  • Color Guard - The term for the guard during the fall marching band season. Their show is performed with the marching band providing music on the football field.
  • Cracker Jack - A flag basic which involves pulling the pole of the flag in two opposite directions, releasing, allowing the flag to rotate once, and catching the pole in the same position. Named after the noise that a pole will make if it contains bolts.
  • Double - A toss that rotates twice in the air before being caught.
  • Equipment - Any prop that is used in the show, including but not limited to flags, rifles, and sabres.
  • Flourish - The back and forth movement of a piece of equipment. Also considered a way of performing with large movements.
  • Jam Weight - A small metal weight used in the ends of aluminum poles, named after the process used to insert it into the pole.
  • Lunge - While standing in a wide second position, one knee is bent and the body is straight above it while the other leg is straight and reaching along the ground.
  • Lock - The preparation for a toss of double or higher on a rifle or sabre. The weapon goes from being flat to being at a 45 degree angle opposite to the direction of the toss. Also called a Prep.
  • Newbie - A new member of the guard, usually reserved for Freshmen and people who have never spun a flag before.
  • Performance - Any time a guard member is in uniform it is considered a performance because everyone in the community can see them. Also, it is how you portray your show to the audience.
  • ole - The pole of the flag, generally made from aluminum.
  • Pow-wow - A sit-down meeting of the color guard with their instructor. Usually scheduled within practice.
  • Prep - See Lock.
  • Rifle - A piece of equipment that resembles a wooden gun.
  • Sabre - A piece of equipment that resembles a spanish sword.
  • Shatter Weight - See Bolt.
  • Silk - The fabric part of the flag.
  • Single - A toss that rotates once in the air before being caught.
  • Spin - The movement of a piece of equipment in a rotational motion in one dimensional plane.
  • Sponsor - Any person or business who donates money to our band that we advertise for. WE LOVE THEM.
  • Stir - A choreographed move in which the equipment moves in a motion that resembles stirring. Also referred to as a carve, witches' brew, or hourglass.
  • Strap - A leather strip found on the underside of a spinning rifle that is not intended to be slung over a shoulder.
  • SYDTO! - A cheer of encouragement and hype for the Liberty Guard.
  • Toss - Any time the equipment is thrown in the air with the intention of being caught.
  • Tracks - A basic move performed with a rifle or sabre in which the weapon passes from one hand to the other flourishing on either side of the body in between.
  • Triple - A toss that rotates three times in the air before being caught.
  • Tropicana - A game of rhythm and focus that the guard likes to play while waiting for something.
  • Quad - A toss that rotates four times in the air before being caught. Also the muscle on the front of your thighs.
  • Weapon - A spinning rifle or sabre. Not actually intended to be used as weapons but referred to as such because they are modeled after actual weapons.
  • Winter Guard - The term for the guard in the spring. Their show is performed in the gymnasium with recorded music.

Wednesday, June 22, 2016

Dictionary of Common Guard-Related Dance Terms - How to color guard

I know we weren't all ballerinas in a past life, so I put together this list of common dance terms that we use in the color guard world to help refer to movements that are used both with and without equipment. They are also spelled correctly, apart from not having the ability to put accents over letters, as far as I know. Enjoy this list and let me know if there are any other dance terms you would like to see make it into the blog.


Arabesque - Standing on one leg with raised leg extended in straight line to rear and foot pointed.

Chasse - To chase. A moving dance step; one foot chases the other out of the way. 

Fifth Position - With the arms, they are curved and high overhead; with the feet, they are turned out with one in front of the other, heel touching toe.

First Position - With the arms, they are curved and low in front of the body; with the

feet, the heels are together and they turn out to form at least a 90 degree angle.

Fourth Position - With the arms, they are curved with one arm high overhead and the

other arm low in front of the body; With the feet, they are turned out with one foot in front of the other with space between.

Grande Plie - To bend at the knees as low as you can possibly go. In first, third, fifth and fourth positions you will pick your heels up off of the ground, in second you will not.

Plie - To bend at the knees. Make sure your feet are turned out and your knees are over your toes while keeping your back straight. 

Releve - To rise. In any position you rise onto your toes without rolling your ankles. 

Saute - To jump off of both legs, extend the back leg and beat the front in the air, and land on the front leg.

Second Position - With the arms, the arms are parallel to the ground extending to both sides with a slight curve, shoulder above elbow above wrist above fingertips; with the legs, feet are shoulder-width or farther apart and turned out. 

Third Position - With the arms, one arm is up high overhead while the other is extended to the side, both are curved; with the legs, the feet are heel to arch and turned out. 

Tuesday, June 21, 2016

Anatomy of a Sabre - How to color guard

I would also like to make a side note that we often now refer to the Hilt guard as the "basket" simply because I have had several instructors also refer to it that way. How about you? Ever call anything differently than what we've got on the diagram here? Let us know with a comment!!

Monday, June 20, 2016

How to toss a rifle - How to color guard

1. PREP From a left flat position, bend your right elbow to make a distinct shoulder-to-hip angle with your rifle. The left hand should not change position. This occurs on count 8 of the 5, 6, 7, 8... count down. You do not need to perform this step if you are only tossing a single.

2. RELEASE Push the butt of the rifle with your right hand and simultaneously pull your left hand up. Let go of the rifle with your fingers pointing toward the sky and hold your right arm down by your side. The push part of this step occurs on the "8-and" of the count down and the release occurs on count 1.

3. CATCH When the rifle has finished rotating in the air, it should end up in front of you so that you can catch in a right flat position.


Trouble Shooting:

- If your rifle is going to the left or right then your fingers are not pointing straight up in the air when you release.

- If the rifle is spinning too fast, push less with your right hand. Too slow? Push harder.

- If the rifle is going to high in the air, lower your left hand when you release. Too low? raise your hand.

Sunday, June 19, 2016

Skip Spins/Triple Time/Floating Singles on Rifle - How to color guard

Once the basic spin and double time spin have been mastered for both hands, a skip spin should be accomplishable. Begin the same way you would for a regular spin, but when you release the rifle you must put more energy into the wrist twist so that the rifle will spin a second time before you catch it in the neck. From there, you are performing normal spins but only catching on every other rotation. This can be achieved on both hands.

Saturday, June 18, 2016

Double-time Spins on Rifle - How to color guard

This spin is much harder to perform and even harder to explain than the previous three. Only attempt when you have completely mastered both the regular spin and the top spin.
     Hold the rifle in right flat. Your first spin will be a normal right-handed spin. Upon bringing the rifle up for your second spin, receive the strap side of the barrel in your left hand, thumb pointed toward the tip of the rifle (the place your left hand would be on the rifle if you were doing normal left handed spins). Continue to rotate the rifle in the same counter-clockwise direction by letting go with the right hand. Receive the rifle back to the right hand on top of the barrel (the position it would be in while performing right handed top spins) and then to the left again on top of the neck (the position it would be in while performing left handed top spins). After this step, the rifle should return the neck to the right hand and the process begins again. It should have a bottom-bottom-top-top rhythm with each grab and you will always use both hands.
     On the left side the process is similar, but starting out in left flat. Make one normal left handed spin, on the next spin use the right hand to grab in the normal right handed spin place on the neck, receive back to the left on the top of the butt, then with the right on the top of the barrel. Again, a bottom-bottom-top-top rhythm will be acquired.
     Work toward achieving these one-handed.

Friday, June 17, 2016

Top Spins on Rifle - How to color guard

A top spin becomes a little more complicated since rifles are not particularly balanced for spinning upside down. This is much easier to do with a curve or a sickle rifle.
     Begin by turning the rifle upside down (strap up and bolt down) and pointing the nose to the right. Assume the position that you would for a right flat, with the right hand underneath the barrel and the left hand on top of the upturned butt. Push down with the left hand and spin by catching the rifle on top of the barrel with the butt end pointing at the ground.
     To achieve the same spin on the left hand turn the rifle upside down just as before, but hold it as if you are in left flat, with the left hand underneath the top of the butt, and the right hand on top of the screw. Push down with the right hand and spin by catching the rifle at the top of the neck with the tip of the rifle pointed downward. Again, these spins are best practiced in a mirror.

Thursday, June 16, 2016

Single Spins on Rifle (Consecutives) - How to color guard

Learning the basic spin is the basis for any rifle work that can be done. To spin on the right hand, start by holding the rifle in right flat. Push the tip of the rifle down with your left hand and rotate your right wrist. The rifle should move in a counter-clockwise motion from the spinner's point of view. Once the rifle reaches flat in an upside down position (palm of hand is down), release with the right hand and turn the hand over to catch the rifle in the neck again. This is not a toss, but the rifle does leave your hand for a split second. The rifle should now be straight up and down with the tip pointing toward the ground. To spin consecutively, just continually twist your right wrist, release and catch in the same place. To stop at the end of a set of spins, allow the rifle to make a half spin and then catch in left flat.
     To spin on the left, you preform the same operations but backward. You begin in left flat, push the butt down with your right hand, catch your left hand between the screw and the front end of the bolt, then to stop after a series you stop in right flat. This spin will look clockwise to the spinner and counterclockwise to the audience.
     Some important notes include: do not look at your rifle while you are spinning it! It is best to practice by watching yourself in a mirror. Also, be sure that your free hand (the hand that is not performing the actual spinning) stays by your side.

Wednesday, June 15, 2016

Rifle Flat Positions - How to color guard

Right Flat
+ Your right hand should be under the neck of the rifle. 
+ Your left hand should be over the nose of the rifle. 
+ Your right elbow should be slightly bent and your left elbow should be boxed (NOT like the picture!). 
+ The topline of the rifle (from the bolt down the barrel) should be parallel with the floor. 
+ The rifle should be held at the level just below your belly button.

Left Flat

+ Your right hand should be over the butt of the rifle.

+ Your left hand should be under the rifle, halfway between the screw and bolt.

+ Your right elbow should be boxed and left elbow should be slightly bent (NOT like the picture!). 

+ The topline of the rifle (from the bolt down the barrel) should be parallel with the floor. 

+ The rifle should be held at the level just below your belly button.

Tuesday, June 14, 2016

How to tape a rifle - How to color guard

You have just purchased a beautiful new rifle and you cannot wait to spin it! But to prevent your rifle from breaking the first time it hits the ground (because everybody drops sometimes) you first need to tape it properly.


First of all, use a phillips head screwdriver (the kind with the + tip) to remove the two screws holding the bolt in place and take off the bolt.

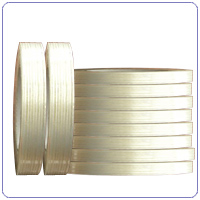
<< Strapping tape in both 1/2" and 3/4" widths.

     Quite possibly the most crucial supply you need for taping your rifle is strapping tape. It is a plastic tape that has string ribs for support and generally can be found for about $6 per roll at any band supply store. Wrap separate pieces of strapping tape in the specific locations shown in the picture: wrap once or twice around the three places under the bolt and two to three times on the barrel in front of the bolt and on the neck.


Now that you have your strapping tape base, you can apply electrical tape. Generally, white tape is used on white rifles, but electrical tape comes in a variety of colors for you to choose from.

     Starting in the neck, wrap the electrical tape around the rifle and travel forward, making sure that each wrap of the tape slightly overlaps the previous wrap. Cover the area under the butt labeled with a number 1 in the picture by wrapping continuously.

     When wrapping at point 2 on the diagram, make sure that you cover the screw that holds the strap in place, this will prevent the screw from coming lose and/or scratching you while you spin. For point 3, use three strips of tape and place them down the bottom of the butt long ways, this will hold the pad in place and prevent the wood on the end from being chewed up. Repeat the same process for part 4 (the front of the tip) using shorter pieces of tape.


Finish the job! Wrap around the rifle continuously with your tape (shown in a different color for your convenience) at point 1 and again at point 2 (make sure you cover the back screw at point 2). Then use electrical tape that matches the color of your strap and wrap it three times around point 3 and 4 to ensure that the Chicago screws do not come loose.

     Finally, screw the bolt back on. There are a lot of creative ways to tape a rifle, this is just one basic way. Some people use sparkle tape or glow in the dark tape to create different effects. You can also tape the entire rifle, tape the bolt, or tape the strap to make it a different color! The possibilities are endless.  

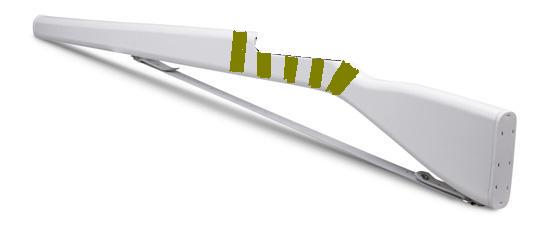
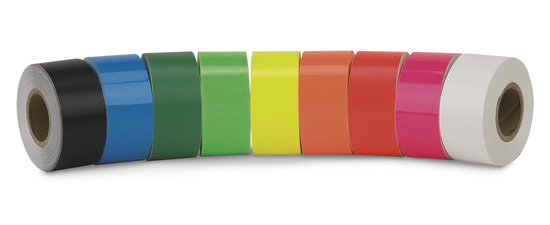
<< Colored electrical tape. Rifle tape is also available in prism, sparkle and other effective colors.

Monday, June 13, 2016

Purchasing a Rifle - How to color guard

There are many different models of rifles in the world, and this guide will help you sort through the facts and features of purchasing your very own rifle.


Beginners

For absolute beginners who have never even touched a rifle before, most companies offer models that do not have bolts on top or straps to get your fingers tangled in. They may have rubber padding on the ends and generally are only 32" long. They are also lighter than a standard rifle and at a price of around $15.00 they will not break your budget. These beginner rifles are a good way to start learning how to spin and getting used to the movement of the rifle without getting hurt.  

Intermediate

Once you have mastered the beginner's rifle, intermediate spinners will generally move up and purchase an advanced-class rifle, but there are other options available to them as well. Some companies offer rifles that are nearly the same as advanced rifles, but may or may not have a strap, or possibly still have a rubber tip on the end. Length will be from 36"-39" although the longer ones will usually be for more advanced spinners. These rifles may be a little bit more breakable than the best quality ones, but they have a very classy, showy look to them.

Some models of popular intermediate rifles include Charger, Commander, Cadet, etc.


Advanced

Moving on to the "big guns" so to speak, there are many models of rifles to choose from and they may tend to look the same - but do not be fooled! Also, when thinking of length of the rifle consider whether you are spinning for a field show or indoor performance; longer 39" rifles generally show up better from the stand on the field while the versatility of the 36" is usually favored for indoor shows where the audience is closer. Straps to consider are leather, nylon, or web. Leather straps have been favored until recently because of their professional look and the snapping sound that they create when the rifle is being spun. Web straps have seen a dramatic increase in popularity due to their versatility.


Brands

Elite 2, 3, and 4

The difference between the 3 and 4 is just the length, but this model is an ok quality rifle with many good reviews. While not unbreakable, this rifle will hold up best if you only spin it over grass or other soft surfaces. The first thing I would do with these rifles if I were to purchase new ones is to immediately remove all of the screws that come in the gun and replace them with real wood screws that you can find at your local hardware store. The screws used on these rifles are terribly cheap and tend to immediately shear off into the wood the first time the rifle is dropped.

Xfactor

This is the world's first plastic rifle and it's definitely got some good points. All of the Xfactors are weighted exactly the same and they have screw-in weights that you can put into each end in order to change the weight if necessary. However, with all new products there is a lot of testing and improvements that need to occur. The locations where weights get screwed in are prone to breakage, leaving a free weight to just float and bounce around inside of the hollow plastic gun. And even though they were once advertised as ubreakable, many guard members have since proven that to be false advertising, especially if spun over concrete or tile floors.

George Miller and Sons (Ultimate)

If you've been around any "old timers" in the guard world like me, you've probably heard of this model; which was also called the Ultimate at one point. By far the best rifle that has been designed yet. The Miller has the best durability of any model of rifle while still being well weighted and balanced. The price also stayed competitive with the other models. Miller rifles could only be found at the George Miller and Sons website while they were around, but as all good things come to an end, so did this company. But fear not! As they have SOLD their design to King!

King

The King brand dominates the sabre industry, and these rifles live up to the legend of King products being perfectly balanced in all aspects. They practically spin themselves, but some lightness must be sacrificed to achieve this balance and these rifles are best left to the most advanced of users. I know of many people who have George Miller/King rifles between 12-20 years old without so much as a crack in the wood, so they are definitely worth the price!

Sickle Rifles/Air Blades

Sickles (or Curves) are not exactly a new style of rifle, but they have seen increasing popularity because of their use by the Phantom Regiment Drum and Bugle Corps Color Guard. These pieces of equipment loosely resemble rifles, but are essentially a curved piece of wood with or without a strap. They are very easy to spin because of their tailored shape and create a spectacular circular effect in shows. Their prices also usually run a little bit cheaper for wood or more for plastic than normal rifles so they are a good addition to a great color guard.

Saturday, June 11, 2016

Thumbflips - How to color guard

This is not so much a spin as it is a half-turn, but it still has the same circular motion so it is often included with spin descriptions.
     Begin with the flag straight up and down with the silk up, right hand on the tab thumb up. Open your hand so that the flag rolls on the palm (counter-clockwise to the spinner) until the silk points down and then grab it. The flag should now be straight up and down with the silk down, and the right hand still at the tab with thumb up. Open the palm again so that the flag continues its counter-clockwise roll until the silk is up again.
     This move does not necessarily have to take place on the tab. This can be spun from the center of the pole all the way to the tip and back to the tab, depending on the height and arm length of the spinner. One can also begin the flips at the tab and move down and back up the pole while flipping, making a good exercise to strengthen wrists.
     The flip it stopped just by doing the flip itself. Since this is not a continuous motion spin there is no need for a hard stop.

Friday, June 10, 2016

Peggy Spins or Over-Hand Spins - How to color guard

Created by Peggy Twigg, along with a multitude of other moves she created in the 1970's as a member of the 27th Lancers Drum and Bugle Corps flag line, this is her namesake move and arguably the most complicated spin currently taught on flag.
     A peggy spin does not seem much different from a speed spin at first, but it creates a dramatically different effect when coordinated and spun properly. It generates two different sized spins, and the larger of the two spins is actually faster so that it completes its revolution in the same amount of counts as the smaller spin.
    Begin as you would a speed spin, but instead of grabbing the silk side of the flag below your right hand, grab the pole side of the flag ABOVE your right hand. Bring the flag through the up and down position to flat again and grab palms up with your right hand just as before, but each time the left hand grabs onto the flag make sure to grab ABOVE your right hand. Your hands should move up and down the pole somewhat and this is what creates the big circle/little circle effect. Between the time where the right hand grabs palms up and the left hand grabs thumbs down above the right is where the flag speeds up.
    Stopping is the same as for a speed spin.

Thursday, June 9, 2016

Double Time Spins or Speed Spins - How to color guard

Often, these sort of spins are confused with Peggy Spins, or over-hand spins, but they are a much simpler alternative to those complicated spins. They still add a really great level of speed change to your program so use them where you can!
     Begin in right shoulder once again. The first count is the same as if you were doing a drop spin, the right hand brings the flag upside down into your left hand, which grabs the silk with the thumb down. However, on the second count, the left hand brings the flag through straight up and down and stops when the pole is flat, silk to the left. The right hand grabs here with the palm up, mirroring the position of the left hand. Left hand releases the flag, right hand continues the motion until the flag is straight up and down with the silk up and the thumb down. Left hand then grabs on the pole below the right hand with the thumb down as well. Next, the right hand once again releases and the left hand brings the flag flat with the palm of the hand facing up. Repeat the same motion as before by grabbing the pole with your right hand palm up and continue the spin, grabbing with the left hand thumbs down every time the flag come straight up and down, and grabbing with the right hand palms up every time the flag comes flat.
     This spin can be stopped in the flat position by grabbing with your right hand on the flat and sliding it toward the bottom tip, or it can be pulled into a drop spin stop after the left hand grabs thumb down.

Wednesday, June 8, 2016

The Drop Spin - How to color guard

This is the most basic spin that can be done with a flag.
     Begin in right shoulder (or left shoulder for left-handed spins). Remove your left hand from the bottom tip and turn the flag upside down with your right hand. Make sure that the silk goes down to your left and the pole comes up to your right. It is very important that you do not remove your right hand from the tab or change its position. Once the flag is straight up and down in front of your nose, place your left hand back on the flag, thumb down, and below the right hand. While the silk is down, both thumbs should be pointing down the flag pole. Remove the right hand and continue the spin in the same direction it was started in but with the left hand. Once flag is straight up with the silk up again, grab it with your right hand on the tab, thumb up. Let go of the flag with your left hand and continue the spin with the right until it is upside down again and repeat.
     The spins should be fluid (do not stop at the top and bottom except when you are first learning to spin) and should take place with your hands directly in front of your belly-button at all times.
     This spin can be stopped using a classic drop stop. Drop the flag into your left hand (like the first count of the spin) then pull the flag up straight, let go with both hands and regrab with the left hand 1/3 of the way from the top tip in the silk and the right hand at the tab.

What do you think? Is this the way spins are done at your guard? Was this a good description or terrible? Let us know with a comment!

Tuesday, June 7, 2016

Shoulder and flat positions on flag - How to color guard


Right shoulder

  • Flag pole should be straight up and down directly in front of the nose and belly button.
  • Right hand should e wrapped around the tab in a thumbs-up position.
  • Left hand should be wrapped around the bottom tip in a thumbs-up position with the pinky finger off the edge of the tip (or flush with the end of the tip, or showing the bottom tip, depending on your guard's technique).
  • The left hand should hold the flag in front of the belly button with a fist width between the body and tip.
  • Both elbows should be boxed.
  • This can be switched to left shoulder by reversing the hand positions.


Right flat

  • Can be achieved by starting in right shoulder position and lowering the flag so that the pole is parallel to the ground.
  • Silk should point to the right of body.
  • Bare pole should be centered at belly button across body.
  • Elbows should be boxed (NOT like the diagram!)
  • This can be switched to left flag by pointing the silk to the left and reversing the hand positions.

Monday, June 6, 2016

Insert Jam Weights - How to color guard

Tips:
- do this on a concrete or beat up tile surface so that you do not cause damage to the floor!
- only use aluminum poles for these weights as they can split fiberglass poles.
- some companies make their pole/jam weight size slightly off even though they might all advertise 1" diameter, so make sure you are using poles and weights from the same company.
- these weights CANNOT be removed once inserted unless you have a wide variety of tools, so they are not the most recommended use weights!

1. Place the weight upright on the ground as shown below.
2. Remove the tip from the bare aluminum pole.
3. Place the end of the pole onto the jam weight and use pressure to wedge weight into the pole enough so that when you lift the pole the weight will lift off the ground with it.
4. Jam the pole into the floor repeatedly, making sure the pole stays straight up and down with each jam to prevent the weight from inserting at an angle.
5. Stop jamming when the top of the weight it flush in line with the top of the pole.
6. Replace the tip, turn the pole over and repeat on the other end.

Sunday, June 5, 2016

Anatomy of a Flag - How to color guard

By request, here are the parts of the flag as we refer to them in our How to color guard videos. We generally like to use 6' aluminum flag poles and curved 36"x54" poly china silk for our flags. Fiberglass poles are alright too, but they don't last forever like aluminum ones do and you will have to replace them after several years. Enjoy and leave us some comments; do you call different parts of the flags different things in your guard? What kind of materials dos your guard use? How tall are your poles?

Saturday, June 4, 2016

On perseverance: How to color guard (from Tumblr)

Always persevere. 

One bad performance should only motivate you to fix your mistakes and improve, not give up. Your mistakes don’t define who you are as a performer, how you address them does. There’s no point in dwelling on what if’s, focus on improving yourself constantly and you’ll be a truly successful member of color guard.

Friday, June 3, 2016

You're Just After My Money!

If you are parent who thinks this way about arts instructors then it’s time you and I had a talk. Arts instructors aren’t big businesses or corporations trying to deceive you into dumping your salary into their bank accounts. They are real people just like you who want to eat dinner, pay their bills, and take care of their families. Arts instructors don’t make much and they usually know that they won’t make much long before they choose teaching in the arts as their career path.

So what then? Why do the arts cost so much? 
Well, cost so much in comparison to what? The free public education that your children are handed without question? The cheaply made products that are imported from China and quit working after a week? Yeah, the arts cost more than those things, but in this case you really get what you pay for! You know what the arts don’t cost more than? A motorcycle hobby, a full sleeve tattoo, a lifetime of drugs and alcohol, a sports car, gambling debt, and the list goes on. I’m not judging or endorsing any of these things, but when you compare what you are getting from any one of those things to what you are investing in your kid by putting them through the arts you would realize how cheap the arts really are. You have no business telling your local arts instructor that you can’t afford a payment of $5 per week when you are purchasing a $6 pack of beer every weekend. Arts instruction gives your kid a sense of responsibility, time management, pride in their work, leadership skills, and a whole slew of other qualities that will improve their lives so they will be better equipped to take care of you in your old age. Beer just gives you a bigger gut and some dead brain cells. You really need to evaluate what’s the important thing here if that’s going on in your household.

With arts instructors you often get what you pay for as well. And it’s not really because some are SO MUCH better than others, but what they charge generally indicates how much of their lives is dedicated to teaching the arts to your kid. If they charge a little that probably means they have another full time job that they are living off of, and they just teach the arts on the side because it’s fun. If they charge a lot then they probably don’t have another job outside of teaching the arts and they dedicate all of their time to bettering themselves as arts instructors so they can give your kid the best arts education possible. But they still have to eat and that costs money. They still have bills and families and everything else a normal human being has… just. like. you.

There are always complaints when I raise prices at Spintronix. There are also complaints when we don’t have enough equipment, the mirrors aren’t all the same size or angle, our dance floor is concrete, there aren’t any showers, the bus doesn’t work yet, and the list goes on. I would gladly fix any one of those things if you wanted to pay for it. I could charge $800 per student and we would have a grand facility. I could charge $1500 per student and quit my day job as a public school teacher so I could spend more time and energy making Spintronix better. But you won’t pay that, so I don’t charge it, and we make the best of what we have. I apply for grants, I ask for donations, and I work hard at my full time job. Most arts instructors are like this; they will bend over backwards to make sure your kid gets everything out of the arts that they can. So don’t tell them they are just after your money, because clearly that’s not what it’s about at all.

Thursday, June 2, 2016

Travel, travel, and more travel!

So many great things have been going on in the last few weeks in Spintronix land… Hopefully you have all been watching the vlog on our YouTube channel because it’s a really detailed account of everything that we are up to over here. But I wanted to write an update too, just in case anybody out there still enjoys sitting down to read an article once in a while!

First and foremost, the SIG traveled to Oklahoma over the weekend and took first in class for the first time ever! We even got a pretty green and gold trophy to set in our window back home. The trip was so thrilling, even with a five hour ride in the vans there and back. We ate at the Hard Rock Casino in Tulsa and it was amazing. The food was good, the atmosphere was noisy and bright, and we had a great time all around. Swimming at the hotel was a really fun time for the members too, as they played a really crazy game of Marco Polo and had some really great group bonding time!

Secondly, I made the announcement this week of my involvement with the 2016 Olympic Games Opening Ceremonies! I have been whispering all this time about a #SuperSecretProject that was my audition for a role as a dancer. Well, I was accepted and I am one of six Americans who will be traveling to Brazil this summer to entertain you on your television! If you haven’t seen it yet, click on over to our YouTube channel to watch my audition video. I’ll keep you updated about what’s going on with blogs and vlogs as I get ready for my trip!

Finally, we are getting all geared up here in Missouri for our annual Weekend Camp! If you haven’t registered yet please do because we cannot wait to see you here. For anyone coming from far away, we can pick you up at the Springfield-Branson airport Friday morning/afternoon and drop you back off Sunday evening or Monday! Several of our staff members are coming in via plane so we are heading that way already. :-) It is going to be another really incredible weekend of color guard education and fun so don’t miss it!

#colorguard #winterguard #Rio2016 #Olympics2016 #SIG2016 #travel

Wednesday, June 1, 2016

Responses to 5 common guard-related excuses

E: I can’t do it, I’m not coordinated enough.
R: Where do you think you are going to learn coordination?

E: If I do it, I’ll just hit myself in the head.
R: So you will be just like everyone else. I know people who have done guard for 20 years or more and still hit themselves in the head sometimes.

E: I don’t have enough money.
R: If you really want to do this at all, you will find a way to get the money.

E: I don’t want to give up all my weekends.
R: Because your Netflix doesn’t allow streaming of your favorite shows during the week somehow?

E: My parents won’t let me.
R: Yes they will, you just have to present it in the most customized appealing way.